Adjust · seating, fixings and alignment
How to adjust drawer slides
Check that the drawer is seated correctly and its mounting points are sound before moving the rails. Then use the adjustment provided by that hardware, changing one thing at a time.
Start with what the drawer is doing
A crooked front, binding travel and a drawer that stops short can have different causes. The Planner asks which problem you see before choosing the next check.
If you opened this guide from a Planner result, return to that tab to keep your answers and continue the same check.
The interactive Planner needs JavaScript. The guidance on this page remains available below.
Check these before making an adjustment
- Unload and inspect. Remove loose items that could interfere with travel. Compare the gaps around the front with the drawer in its normal closed position. Note where it catches rather than repeatedly forcing it through.
- Check the drawer box and running hardware. A split box, separated joint, bent rail or broken mechanism needs the appropriate repair or replacement. Adjustment cannot restore a damaged part.
- Check seating and engagement. Verify that the drawer is correctly engaged on both sides and that its required locks or rear attachments are seated. Use the removal guide if access is needed, then the model’s reinsertion instructions.
- Check fixing points. Look for a loose screw, shifted bracket or damaged mounting surface. Secure sound fixings as specified. A screw that spins without gripping needs its mounting point repaired; overtightening is not an adjustment.
Align the running hardware before the drawer front
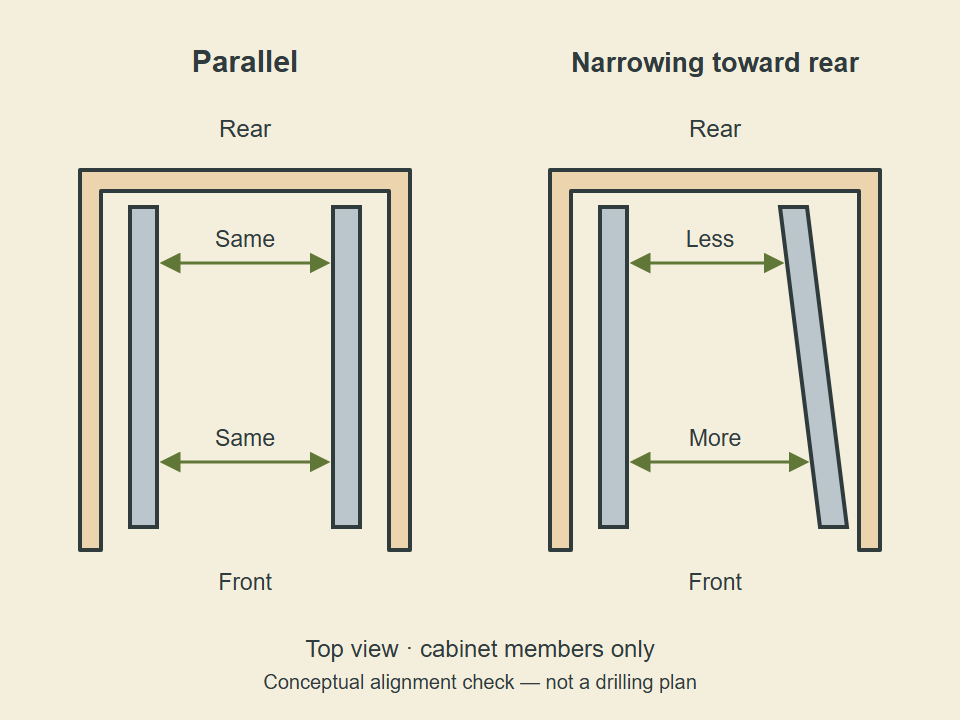
For paired side slides, compare mounting height and front position on both sides, then check spacing front to rear against the chosen model’s requirements. Check the drawer members too. Do not use a front adjustment to hide a rail that runs at an angle.
Where the instructions provide adjustment slots, support the drawer or member, mark the starting position and loosen only the specified fixings enough for that adjustment. Make a small correction, retighten and test. Complete all required final fixings; leaving a rail loose is not a working solution.
For concealed runners or metal-sided drawer systems, identify the exact system and its adjustment controls first. A front height, lateral, tilt or depth control may change a different relationship. For example, the TANDEM 563H/563. instructions distinguish these controls and the locking devices that provide them. Do not transfer their directions or adjustment limits to a different runner.
A single center slide or furniture track needs its own centerline and support checks; it is not a pair of side rails. Use the matching assembly instructions before moving a front or rear support.
Test one change, then decide what remains
With required fixings secure, cycle the empty drawer through its intended travel. Check smooth motion, front gaps and full closing. Return the normal contents only after it runs properly and the hardware is within its documented rating.
- It still binds or grinds
- Use the sticking and binding checks to separate obstruction, alignment and running-hardware damage. Do not keep shifting rails without locating the cause.
- It still stops short of closed
- Follow the closing checks for interference, seating and the closing mechanism.
- It still sags or sits crooked
- Follow the sagging and crooked-drawer route to check the box, supports and visible damage.
- A part is visibly damaged
- Use the replacement guide to distinguish a matched repair component from the complete running hardware. Failure of one small part does not automatically require a new slide system.