Fix · a sagging or crooked drawer
Drawer sags or sits crooked?
Check the drawer box before adjusting its slides. A split side or loose joint needs repair first. If the box is sound, check loose mountings and unequal runner positions before looking for worn guides or bent rails.
Find what has moved or failed
Start with what you can see. The Planner checks the box, mountings and alignment, then asks about hardware damage only if needed. You can leave a check unresolved.
The interactive Planner needs JavaScript. The guidance on this page remains available below.
First, separate the drawer box from its supports
Empty the drawer and support it while inspecting accessible joints and mounting points. Look for a cracked side, a separating joint or material pulling away around a fixing. A sound slide cannot keep a damaged box square. Repair the structure before judging the alignment of the running hardware.
If the box is sound but a screw or bracket has moved, check the material supporting that fixing too. A screw that no longer grips is not resolved by repeatedly tightening it. Restore a secure mounting point using a repair appropriate to the furniture and hardware.
If the drawer is visibly detached from a runner, use the disconnected or broken hardware checks. If you cannot see enough to distinguish the fault, keep the next step as inspection rather than choosing replacement slides.
Compare mounting positions in two directions
For paired runners, compare the left and right mounting heights, then the front and rear supports. A shifted rear bracket can leave the front looking reasonably aligned while the drawer drops or twists farther out. The diagram inside the Planner compares mounting height with the drawer removed.
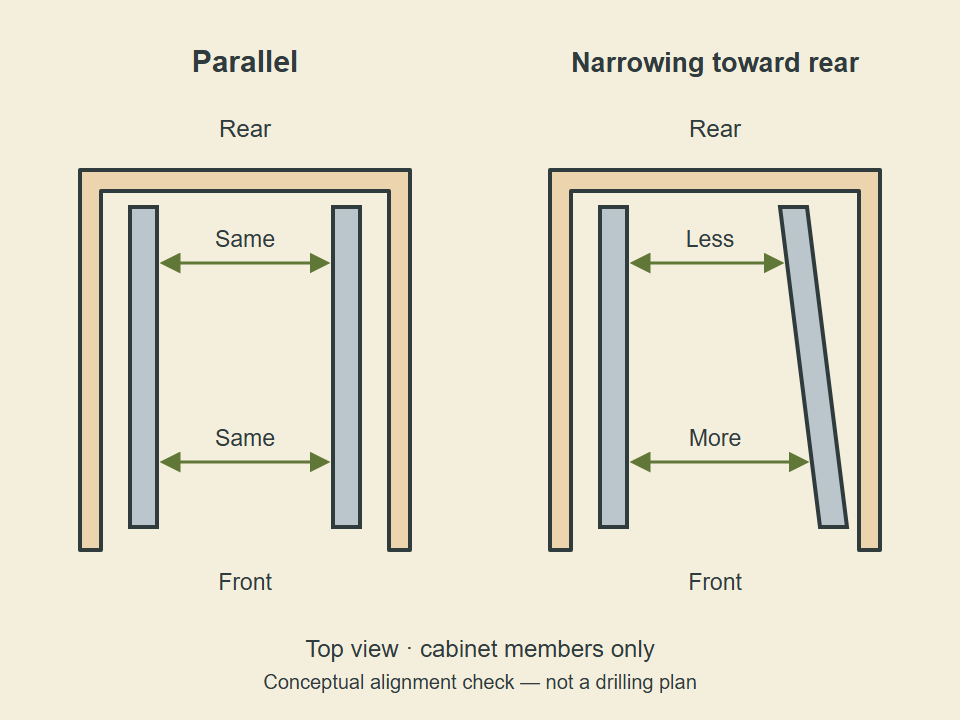
Use the drawer-slide adjustment guide for accessible fixings, supported adjustments and a controlled retest. Work from the instructions for the identified hardware. Avoid changing several positions at once or using the decorative front to hide a structural fault.
Check the box and its runners separately from the face attached to it. If the box runs square but only the face sits unevenly in the opening, inspect the front attachment and any adjustment intended for that system before moving the runners.
Let visible damage determine the repair
- A roller, guide or small part is worn or broken
- A localized repair may be possible if the main runner is sound. Match the exact component, its attachment and the system it belongs to. Similar-looking rollers, guides and locking devices are not automatically interchangeable.
- A rail is bent or the main mechanism is damaged
- Identify the construction before planning replacement. Paired side slides, a single center track, wooden runners and proprietary metal drawer systems require different decisions. Follow the replacement guide for the applicable family.
- No damage is clear, or you cannot inspect it
- Return to secure mounting, alignment and identification. An unresolved check does not prove a worn component or failed set of slides. The Planner keeps its recommendation conditional until the relevant observation is available.
Use the visual hardware identifier if the family is unclear. Photograph any markings and the attachment arrangement before ordering a part; a replacement must fit the existing construction, not just look similar from the front.
Recheck the drawer after the correction
Once the box is sound, the drawer is properly engaged and the required fixings are secure, check its travel empty before returning the contents. Observe whether it stays aligned throughout movement, rather than only when closed. Stop if a support moves or the drawer loses engagement.
If the problem appears only with the usual contents, review the load and the support condition as a separate check. Do not assume a higher-rated slide will repair a cracked box or loose bracket.