Install · side-mount ball-bearing slides
How to install side-mount drawer slides
A smooth-running drawer needs two matching slides mounted straight, parallel and at the correct spacing. Start with the chosen model’s installation sheet, then check fit before drilling.
Already installed, but not running properly?
Use this for paired ball-bearing rails mounted on the drawer sides. Choose what the drawer is doing next; an installation problem does not automatically mean the slides need replacing.
The interactive Planner needs JavaScript. The guidance on this page remains available below.
Before removing the old hardware
Empty and support the drawer. Photograph the existing layout and identify the release before pulling the drawer free; use the removal guide if the mechanism is unclear.
Check the new pair’s actual length, required side clearance, mounting orientation and usable cabinet depth. Confirm its load rating for your application. Matching the old nominal length alone does not confirm fit.
Keep each new drawer member with its matching slide. For replacement of the main running hardware, use a matching pair rather than combining unrelated rails. Check that the selected model retains the opening and closing functions you want.
Have the model’s specified fasteners, suitable driver, measuring tools, straightedge and drawer support ready. Screw length, head profile, pilot holes and mounting positions depend on the hardware and the material receiving the screw.
Set up the rails as one aligned pair
- Prepare sound mounting surfaces. Remove obstructions and repair loose or damaged fixing points. A face frame may require the model’s specified support or brackets behind the opening; the rails need a stable mounting line.
- Lay out both sides from the same references. Use the product drawing for mounting height and front setback, including whether the front is inset or overlay. Do not transfer old holes without checking the new layout.
- Attach the cabinet and drawer members. Separate disconnecting slides by their intended release. Identify which member mounts to the cabinet and which to the drawer. Follow the sheet’s sequence and designated fixing holes; where it provides adjustment slots, use them as directed before final fixing.
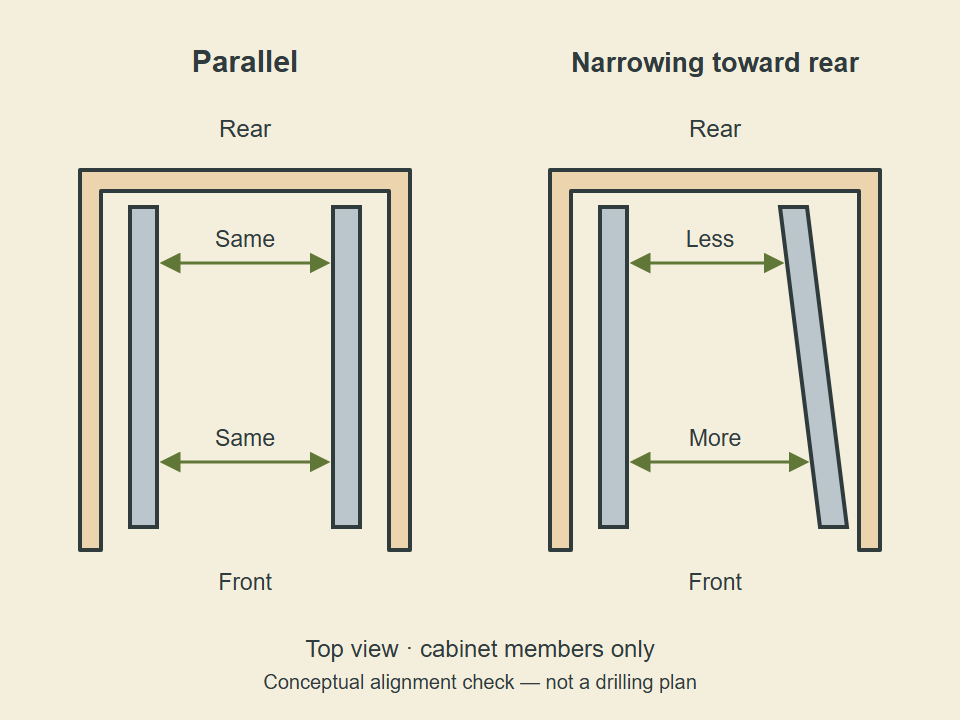
- Check alignment before insertion. Compare the cabinet rails front to rear and left to right. Check the drawer rails against the box references too. A rail can be level yet still angle inward. Do not pull a distorted rail into line by overtightening a screw.
- Engage both sides together. Support the drawer square to the opening. Set the bearing retainers or other engagement parts as the model instructs, then feed both drawer members in evenly. If one side stops or catches, withdraw by the correct release and check it; do not ram the drawer closed.
- Adjust, finish fixing and test. Use the provided adjustment method to align the front. Complete every required fixing position, then cycle the empty drawer and verify full intended travel and closing behavior. Return the normal contents only after the mounting is secure and within the documented rating.
If the first test does not feel right
- It catches at insertion
- Check member engagement and bearing-retainer position. Look for a projecting screw head or a rail that is not aligned with its partner. Compare with the model’s insertion instructions before trying again.
- It binds along the travel
- Recheck spacing and parallelism at several points. Follow the sticking or binding route to distinguish obstruction from alignment and hardware damage.
- The front sits unevenly
- Check that the box is seated on both slides and the mounting is sound before using the adjustment guide. A loose fixing point needs repair, not more adjustment.
- It stops short of closed
- Check for rear interference, incorrect setback or incomplete engagement, then use the drawer-won’t-close route. Do not move holes merely to hide the symptom.