Install · concealed undermount runners
How to install undermount drawer slides
Treat the runners, drawer box and attachments as one matched system. Prepare the box to that system’s drawing, mount the runners, then verify engagement before adjusting the front.
Installed runners need troubleshooting?
Use this for concealed runners underneath a separate drawer box. The Planner will ask what is happening. It does not assume a brand or model from the appearance of the runners.
The interactive Planner needs JavaScript. The guidance on this page remains available below.
Put the matching parts and drawing together
Find the manufacturer, exact runner version and length, and the specified left/right attachments. Confirm that the drawing covers your cabinet construction and inset or overlay front. If the hardware is unfamiliar, identify it before preparing the box.
Check the drawer-box requirements: width, side thickness, bottom recess, length and any rear preparation. A box that fits between the cabinet sides can still be wrong for the runners. Use the cabinet-construction guide to check the intended support; a rear bracket is an attachment choice specified by the system, not a universal undermount accessory.
For replacement, empty and support the drawer and use the correct release method. Keep old attachments until their replacements have been matched. Similar-looking locking devices are not evidence of interchangeability.
Check the front and rear connections
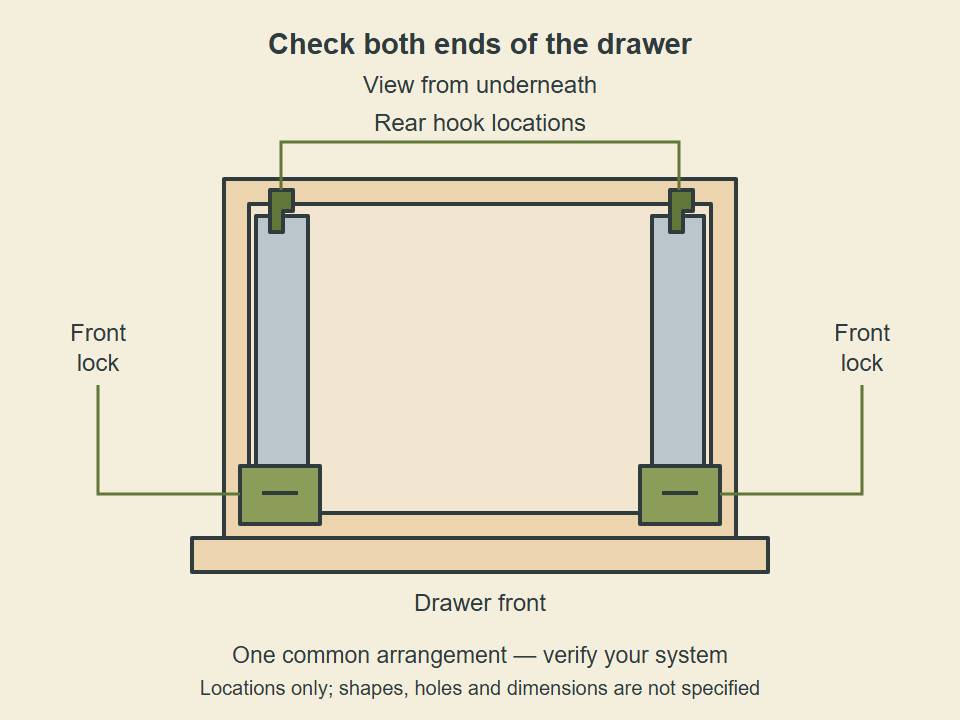
The front devices secure the drawer to the runners in this arrangement; the rear hooks need their matching receiving preparation. A drawer can appear to sit in place while a connection is missed. Other systems may use different attachments, so verify what your kit actually requires.
From prepared box to working drawer
- Prepare the drawer while it is out. Protect the front and turn the empty box over for access. Use the selected system’s drawing or template for any required boring, notching and locking-device fixing. Check the prescribed screw direction and depth; do not copy the conceptual diagram above.
- Fix the runners to sound cabinet support. Set the prescribed height, front position and spacing on both sides. Use the designated fixing locations and matched supports. Complete the mounting securely before placing the drawer on it.
- Seat the drawer by the specified insertion method. For Blum TANDEM 563H/563. and 563F locking-device arrangements, the instructions show extending the runners, placing the drawer on them and closing it to engage the locks. Check rear-hook engagement as part of seating. Use your own system’s method if it differs.
- Verify attachment before adjustment. Confirm both front connections and the rear engagement using the manufacturer’s check. If one side will not engage, remove the drawer correctly and inspect the attachment position and box preparation. Do not use the adjustment controls to compensate for a missed connection.
- Align the front and test operation. Use only the height, side, tilt or depth controls provided by your version; see the adjustment guide for the general approach. Check the empty drawer through its travel, then verify the intended soft-close or push-to-open behavior before normal loading.
Stop at the point that does not match
- A locking device will not engage
- Check its exact part/version, fixing position and the drawer’s seating. Recheck the box preparation against the drawing before drilling another hole.
- The drawer rocks or sits high at the rear
- Check whether the rear attachment is engaged and whether the runner path is obstructed. Avoid forcing the drawer down over a misplaced hook.
- The front will not align within its adjustment range
- Recheck mounting position and box geometry. A small adjustment range cannot correct the wrong box or runner arrangement.
- The drawer moves, but its closing function is wrong
- Check the matched operating parts and the product’s required front conditions. Choose the actual symptom in the troubleshooting tool above; do not assume a failed damper or spring.
If the exact system is still unknown, retain the observed construction and markings and use the Identifier. That is a useful next step before modifying the box or buying attachments.