Replace · center-mount metal slide
How to replace a center-mount drawer slide
Start with the single slide assembly beneath the drawer. Match its mounting arrangement and required space before choosing a replacement; length alone is not enough.
Check that this is your setup
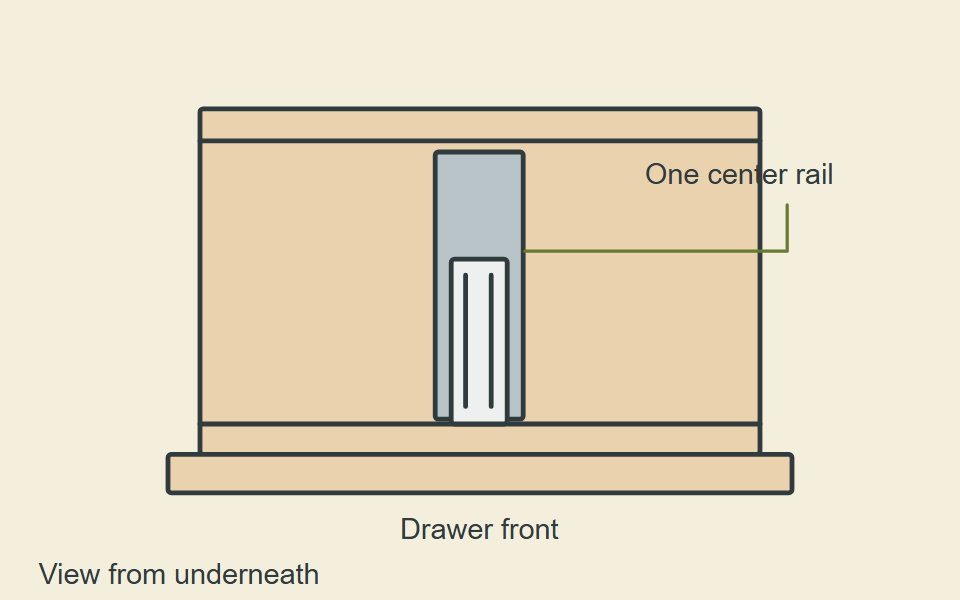
If your dresser has a separate plastic guide running on a furniture track, use the track-and-guide replacement instructions. If the hardware is unclear, identify the old setup first.
Confirm this slide type to plan the replacement. You will choose whether the whole assembly or a small component needs replacing.
The interactive Planner needs JavaScript. The guidance on this page remains available below.
Keep the old assembly until the replacement is checked
Empty and support the drawer, photograph the hardware and use its intended release. If it has separated or come off its track, check whether it can be re-engaged or needs replacement before dismantling it.
Record markings and measure the old hardware. Compare the candidate’s actual length, mounting style, required space and load rating. Check where it attaches to the drawer and cabinet, including front and rear supports. Use the exact manufacturer’s drawing for those comparisons.
A small failed component is a separate decision: use a documented matching part only if the rest of the assembly remains serviceable. Do not combine unrelated moving members because they slide together on the bench.
Replace and align the assembly
- Prepare the fixing points. Remove the old hardware and repair damaged mounting material. Keep the photographs as references; old screw holes do not establish the new layout.
- Lay out the centerline. Follow the chosen assembly’s instructions for drawer and cabinet references. Check both ends so the slide runs straight beneath the drawer.
- Fit the matching hardware. Install the assembly and its specified supports in the documented sequence. Use the required fasteners and fixing positions. A roller/channel design and a telescoping design can attach differently.
- Engage and check the drawer. Follow the model’s insertion procedure, supporting the drawer as it enters. Stop if it catches rather than forcing it over a stop or into a misaligned support.
- Finish adjustment and fixing. Check the drawer’s position through its intended travel, complete the required fixings, then test empty before returning the normal contents.
If it still drops or catches
Check the supports and their attachment to the cabinet as well as the slide itself. A new assembly will not correct a loose rear support or damaged drawer box. If the hardware has disengaged, return to the broken or off-track checks with the drawer supported.