Measure · before choosing hardware
How to measure drawer slides
Start with the hardware itself. Measure a telescoping slide fully closed, end to end. Keep that physical length separate from a printed size, a model code and how far the drawer opens.
Record the length you can check
The helper keeps a clear length marking, a part code and a measured length separate. You can skip an inaccessible measurement and still get a useful next step. Choose a repair or replacement task only when you are ready.
The interactive Planner needs JavaScript. The guidance on this page remains available below.
Use the right endpoints
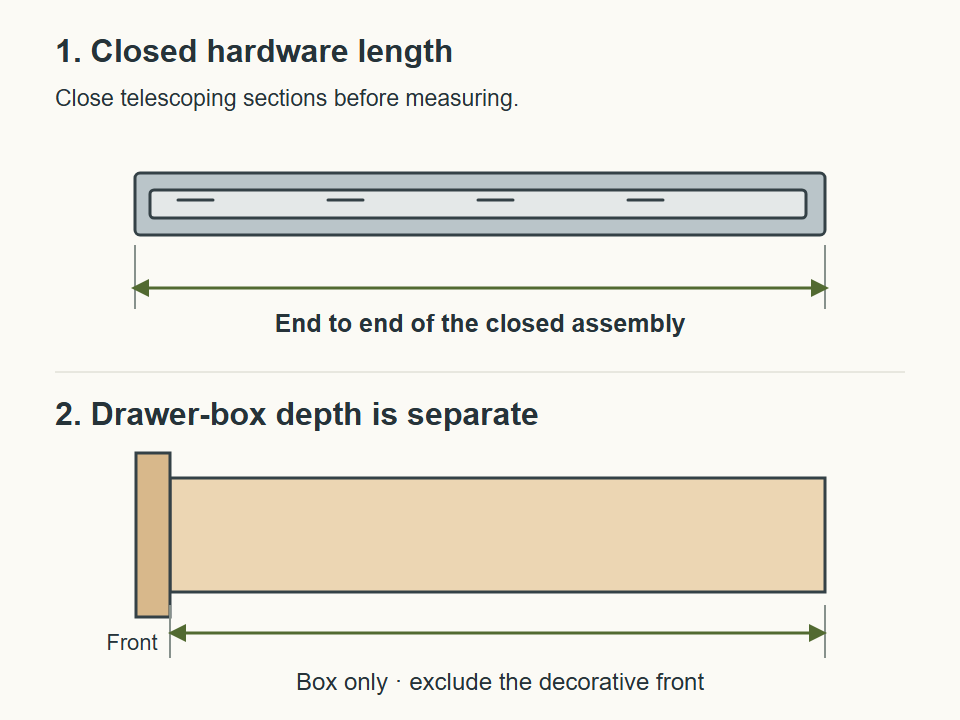
- Empty and support the drawer. If you need to remove it, find the release method for that hardware first. Do not force it past a stop just to get a measurement.
- Close the slide fully. Measure along its length between the physical ends. If the rail is still attached and you cannot see an end, record that the length is unavailable instead of guessing.
- Record the value and unit. Keep the actual measurement; do not round it to a convenient advertised size. The helper accepts decimals and fractions.
- Record any marking separately. An explicit size is useful evidence. A string of letters and numbers may be a model or part code; its digits are not automatically millimeters or inches.
What each measurement tells you
- Closed hardware length
- The physical rail or runner length. Travel distance is how far it moves and must not be substituted for this measurement.
- Marked or advertised length
- A starting point for finding a product drawing. Check the drawing’s actual closed length and fitting requirements before ordering.
- Drawer-box depth
- Measure the box front to back, excluding a separate decorative front. This is not a substitute for slide length.
- Usable cabinet depth
- Check from the intended front mounting position toward the rear obstruction or support. Allow for the chosen product’s specified setback, brackets and rear space; do not assume the entire cabinet depth is available.
- Opening and outside box widths
- These support a side-space check. Measure the box, not its wider front, and inspect the mounting area along the drawer’s travel.
You do not need every dimension for every task
For a same-type replacement, begin with the existing hardware and the candidate’s drawing. Measure additional dimensions when they affect the decision. Keep a short note of the model, units, mounting arrangement and functions you want to retain.
Concealed runners may need drawer-side thickness, bottom recess and attachment preparation. Use the undermount sizing requirements for the selected system rather than a generic box formula.
When the measurements are available, follow the replacement guide or start a task in the Planner. If you are using the helper above, its “Use these measurements in Planner” button carries the recorded values into that task. Measurements stay in the current page session; keep a copy before closing or reloading it.